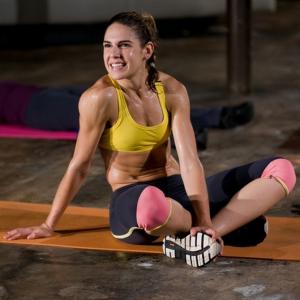
These workouts will help you build strength and stamina without going to the gym.

If you strongly believe that you have been slacking on health and fitness, one of the speediest ways to kick-start toning up is by assimilating strength training into your daily training routine.
It is vital to know that strength training is a substantial part of a well-rounded workout regime that many of us scorn and desert in favour of cardio-focused physical activity.
In fact it has been strongly endorsed to take in strength training activities for all the major clusters of muscle into a fitness regime for at least 2-3 times a week.
Doing this will not just aid in condensing your peril of osteoporosis but also recuperate density of bone, but will also support in structuring lean muscle mass, which benefits in burning body fat while burning down calories.
Along with giving some extraordinary physical rewards, strength training workouts will also help you slash some pretty big highbrow perks as well.
Performing these exercises will also help to reduce those uninvited signs of anxiety, improves awareness, insight and self-confidence, abridges depression signs and improves the quality of sleep in adults detected with depression and stress.
If you are influenced to put those muscles to work but lack equipment’s and space, or you are on a constricted budget or constrained for time, worry not, you must bear in mind that these exercises only involves your body weight, the only training machine you need.
Body weight workouts that contain of the moves that vigour you to pull or push your own weight can help in slimming and toning your physique while adding the vital definition to your muscles.
They also concoct you to take on physical activities you need to complete on a daily basis that is right from carrying bulky bags to practicing good posture and lifting your kids.
Here are some beneficial strength-training workouts that can be done without weights:
1. Squats
Identified to be a true multi-tasker, while you do squats, you train for stability, cut down extra fat compared to other exercises mostly because of the muscle gain, efficiently stimulate your back and core, and supports circulation.
Squats is one of the most effective type of functional trainings.
- To do squats, stand with your hip and feet at a distance, place your hands behind your head or on the hips.
- Grip your core tighter and shoulders should be drawn down, chin must be parallel to the ground.
- Start the workout by leading or pushing the hip backwards, in a position as if one wants to sit back on the chair, all the time guaranteeing that your ab muscles and core are engaged and your tail bone is stuck in.
- Go down to a level where you can uphold the knees unmoving on top of your toes in the direction of the centre of your feet or your middle finger. This has to be followed by breathing out and coming up to a vertical position.
- Breathe in to go down yet again, and keep your thighs parallel to the ground with your knees being just on top of your toes and not directing behind your toes and is in position with the centre of your feet.
2. Prisoner squat
Prisoners squat is very alike to a usual squat but in this our stances are a little different.
The toes are directing outwards, though still, keeping a slight wider than hip at a distance.
The knee is unmoving and tracked on the centre of the feet, core is engaged, hands are behind the head, shoulders are pinched down and chin is parallel to the ground.
3. Forward and back lunge and lift
The forward lunge is a brilliant in terms of functional training owing to the fact that it places the body in a motion that is equivalent to our daily body activities of walking and running.
Whether you have continually chosen to push a hefty sled, run a faster marathon, or accomplish a perfect pistol squat, power hike up a mountain, the forward lunge is certainly sure to assist you get there.
This distinctive move is a helpful way to shape a base strength in each limb.
When you are executing two-legged moves it is easy to recompense for delicate muscles on one side. But when you are lunging, it is vital to identify any body imbalances one may have.
Additionally, the forward lunge is identified to strengthen and segregate each leg on an distinct basis and can be a good pointer of how strong each hip and glute is.
How to perform a forward lunge
- Stand with your booth the foot together and arms being comprised on the hips or in front of torso.
- Taking a larger step in the forward direction with your right foot, falling into a lunge till the time both knees form about a position of 90-degrees with core muscles being engaged.
- Slowly push off the mid of the front order to step right foot back following to the left and consider coming back to the starting position.
- Perform 8 to 12 reps, then duplicate on the other side. Perform 3 sets.
Steps to perform a back lunge
- Start the workout by standing with your both the feet being as wide as the hips.
- Step your left foot backwards and lower down into a lunge position.
- Softly press down through the right heel as you raise the left leg straight up backwards in a way that it will efficiently work and target the hamstring and glute. Following to which lower down back into the lunge position.
- Replicate this move for around 10 times and then shift sides.
- In case of a learner modification, you must take out the leg lift and achieve a standard backwards lunge. If you need additional support, you can hold on to a bench to assist you with the right stability.
4. V-Push-ups
The V stance or the downward dog position is an excellent position to for your shoulder muscles.
- Position yourself in a downward dog position, your hips and tail bone are facing the ceiling and hands should be shoulder width apart, core is engaged.
- Keep your feet hip at a distance and can bend your knees if your back does not straighten out all the way up. Make sure that your back is upright in a downward facing dog position.
- Follow this by angling your elbows diagonally downwards and backwards as you bend your elbow and push the head in the direction of the ground in a shoulder push-up and then come up.
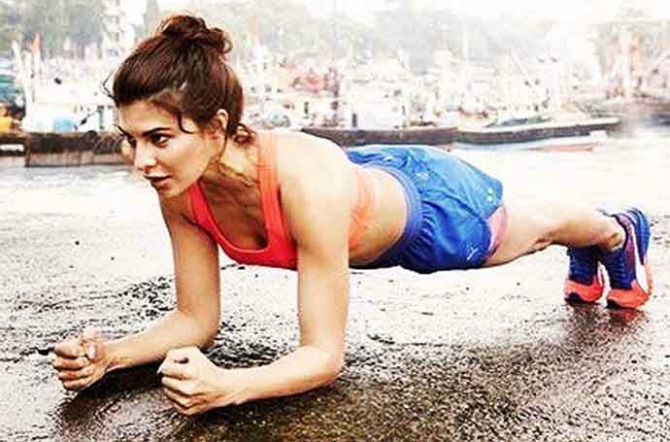
5. Plank Push-ups
A plank push-up is a strength-training exercise that integrates all the core workout of a plank, with the additional shoulder arm and back workout of a typical push-up.
These cluster of muscles get engaged in a single exercise that you can do with no equipment’s at all.
How to perform plank push-ups
- With your toes being on the floor, you must mildly uplift your body off the flat surface by using your arms, and lifting up your knees off the floor till your body forms into a straight line from your heels to the back of your neck.
- As a substitute to bending your elbows to lower down as you would do in an old-style push-up, slowly lower down one arm till the time your elbow and forearm are resting on the floor. With extreme care you must lean on that forearm, and get your other limb down to rest on the floor in the analogous pattern. Get in a plank position.
- Hold the plank until count 1, and then slowly come back to the push-up position, one arm at a time. Repeat the moves for the ideal number of repetitions.
6. Tricep Dips in half and full cobra position
- Be seated on the edge of the bench or chair and firmly hold the edge next to your hips. Your fingers should be pointed towards your foot. Your legs must be stretched and your foot must be hip-width at a distance with the heels touching the flat surface.
- Now lightly lift up your body by pressing into your palms and consider descending in the frontward direction just far enough that your behind clears the chairs edge.
- Lower down and bend your elbows between 45 and 90 degrees.
- Slowly push yourself back up to the start position and then repeat. Monitor the movement all though the series of motion.
- Start with 10 reps and work up to 25 repetitions spread over numerous weeks.
7. Tricep Dips in half cobra position
You must get your hand on your stomach, in the forward direction with your forearms being on the surface forward-facing. You must moderately arch your back by pushing off your forearms. Take deep breath by watching to the ceiling.
8. Tricep Dips in full cobra position
- From your stomach, mildly place your palms on the ground as well to your torso, with fingertips being inline with the front of your shoulders.
- Hug your elbows to your sides.
- Press your hands resolutely into the floor and start to lift your chest into a slight backbend.
9. Superman plank
When you are proficient of holding the usual Plank for more than a minute.
Superman plank is an efficient development that you must certainly give a try.
The Superman Plank starts with your arms being stretched about forty-five degrees in front and on your palms rather than your arms.
All the alike rules and guidelines of the plank apply here too but you will find holding the Superman Plank for a much shortened time period -- begin with fifteen seconds, ensuring that your lower back stays neutral at all times.
The second you get a sense that your hips are starting drop, it is time to stop that rep.
You must up to hold for as long as you can. If you accomplish to reach sixty seconds, you certainly deserve the superhero status.
10. Elbow Plank
Planks are an astounding workout for working on your abs, and the elbow plank is stiffer on the abs as compared to the old-style plank in push-up position.
- Start the exercise with face down on the ground sleeping on your knees and forearms.
- Push off the floor, uplifting your knees off onto your toes and resting primarily on your elbows.
- Contract the muscles of your stomach to assist in keeping yourself up and prevent your booty from sticking up.
- Keep your back is kept flat. During the exercise you must avoid it from dipping. You must picture your body as a long conventional board, or plank.
- Try holding as long as you can. You must intent for about 20 to 30 seconds in the start and toil your way up to one minute, as you get tougher.
- Repeat for about 2-3 times
11. Side Elbow Plank
- You can start the physical training by lying on your side. Get your right elbow directly underneath your right shoulder. You must engage your core, press your right elbow into the ground, and rise into side elbow plank.
- Sway your feet so your left foot is positioned exactly in front your right foot, or consider stacking the heels.
- Gradually you must reach your left arm upwards toward the direction of the ceiling, which will aid you elevate your waist.
- Hold on the movement for about thirty seconds, and work up to holding the position for one minute. Replicate on the other side to totally complete a set, doing a total of 3 sets.
12. The Hundred
The hundred is a distinctive Pilates mat training with at being the only equipment that is required.
This exercise is named after the hundred beats of your arms that are made while your shoulders and head off the exercise mat and you hold your legs drawn-out.
- To do this workout, you need to lie down flat on your back. Unhurriedly elevate your legs and curve them at the knee in the tabletop position with your shins and ankles being in a parallel position to the floor
- Start by breathing in.
- Exhale and get your chin down with your head up and, making use of your abdominal muscles, gradually twist your upper spine up off the floor to the shoulder blades base. By keeping the shoulders sliding down and involved in the back, you must gaze down into the scoop of the abs. You must stay there and breathe in.
- This should be followed by exhaling. At the same time, expand the pull of the abs and spread out your legs and arms. Try and reach your legs in the direction of the ceiling and the wall that meet in front of you. Regulate them if required, or lower for more progressive work. By spreading your arms straight and low, just a few inches off the ground, you must ensure that the fingertips spread for the far wall.
- Hold your position. Follow this by taking 5 short breaths in and 5 short breaths out and during this process, move your arms in a measured up and down manner—a small but vigorous pumping of the arms. Ensure you are positioning your neck and shoulders relaxed and calm. It is the tummy muscles that are essential to perform all the work.
- Do a cycle of ten full breaths. Each set 5 short breathes in and then 5 short breathes out. The most important part of the training is to breathe big. Breathe into your sides and back.
- To complete the training, you must keep your backbone bent as you bring your knees in the direction of your trunk. Hold your knees and roll your upper vertebral column and head down to the floor. Finish by breathing in and out.
13. Single leg extension
How to perform single leg extensions:
- You will need a comfortable chair.
- To do the training you must be seated restfully on the front edge of the chair and grip the seat sides. You can get grip of a dumbbell straight up between your feet in a way that the dumbbells top end will rest in contradiction to the top of your feet.
- Lean back slightly, but keep your back in a straight stance. Raise your feet so the dumbbell is not stirring the floor at all. Your lower legs should be in the direction that is vertical to the flat surface. Spread out your limbs by flattening your knees till your limbs are about equal to the base.
- Pause before slowly lowering back to the primary position.
14. Single leg extensions with obliques
- Start the exercise in a plank position while you make sure your body is in the straight line and your fingers are in a straight line beneath your shoulders. This should be followed by bending one leg and getting the knees near the direction of your shoulder on the same side, chomping your oblique’s as you do so. By keeping the upper body in a motionless position all through the movement, you must take a gap and then returning the leg to the position from where you start.
- To complete, your body is the most excellent tool you have for getting a great strength training exercise in with equipment’s and weights needed.
Shalini Bhargava is director at JG'S Fitness Centre, Santacruz, Mumbai. She can be contacted on ga@rediff-inc.com.